 Lenka's Way of Lace
Old Wise Tree: PART 3 – Tree Crown Bobbin Lace
First row
The first row of Torchon ground is worked from right to left with the outline pair being the leading pair. The first pinhole on the pricking is encircled, which means it is a hole for a support pin. Pins with glass heads are helpful as support pins, because they hold the threads well and the big heads prevent the threads from slipping over. Also, if three different colours of pins are used, they mark the footside sequence and make it easy to keep track of the pairs (see the pink, white and green pins in the sample).
Insert a support pin in the first hole. Outline pair is on the right side of the pin.
Start working the torchon ground (CT-pin-CT) with the outline pair, from right to left, through all ground pairs.
(In the sample, the ground pairs are matched = both threads in one pair are the same colour).

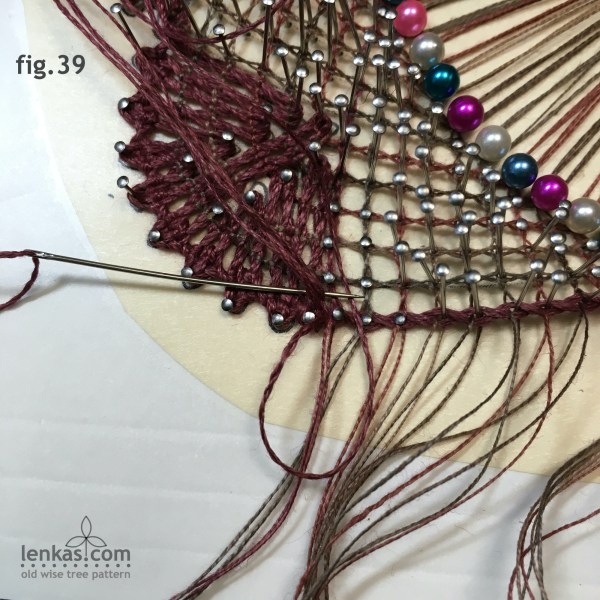
At the end of the first row, the outline pair reaches the headside.

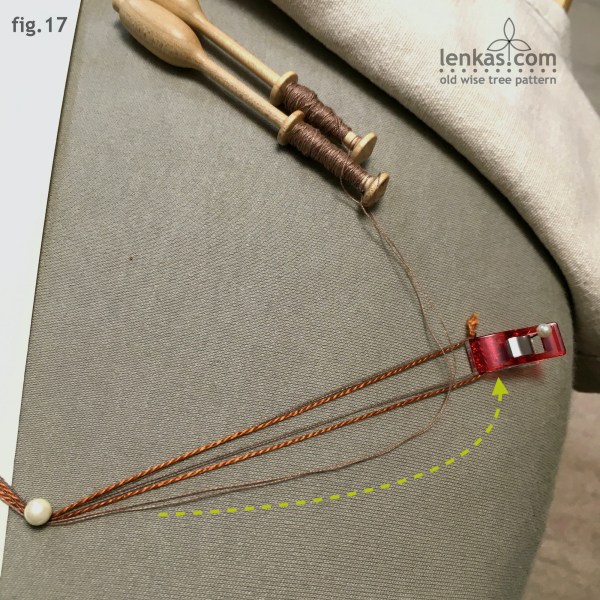
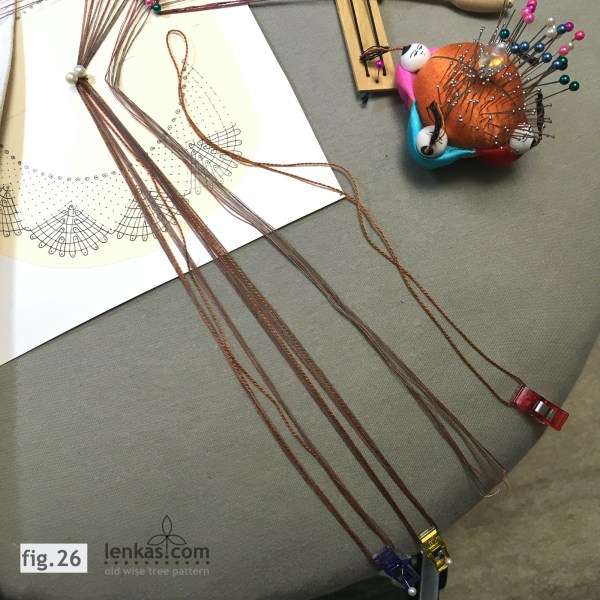
Before the second row starts, it is necessary to release threads form the footside pair. Place a support pin (pink) in the pinhole and lead the ground pair on the left side of the pin. This pair, instead of working a normal footside, is going to be unwound and anchored at the distance of approximately 40cm (16″) before it returns to the lace. Previously prepared support loop helps to measure this distance, and the attached wonder clip assist with holding the threads. Place a divider pin in top centre pinhole. Hang one support loop on this pin.

The support loop is 30cm (12″) long, which is the amount of thread that needs to be released from the ground pair to reach the wonder clip at the end of the loop.

Add both released threads to the clip. Pin the wonder clip to the pillow with another divider pin to keep the support loop taut, and the ground pair under tension. Unwind more threads to bring the pair back to the footside.

When working on a smaller pillow, where the support loop extends beyond the pillow’s edge, use one more divider pin as an anchor, bend the threads around it and then pin the clip close to the edge of the pillow.

Bring the ground pair back to the footside, leading it on the right side of the support pin. This pair is now ready to start the torchon ground row.

After the row is finished, return to the footside. Use another colour for the second footside support pin (white).
Lead the pair around the centre divider pin and add the threads to the wonder clip.
Bring pair back to footside and go on to make the next ground row. Repeat with the next footside pair #3 (green pin). After that the wonder clip holds the support loop and six thread loops from pairs #1, 2 and 3. This clip is now “full”.
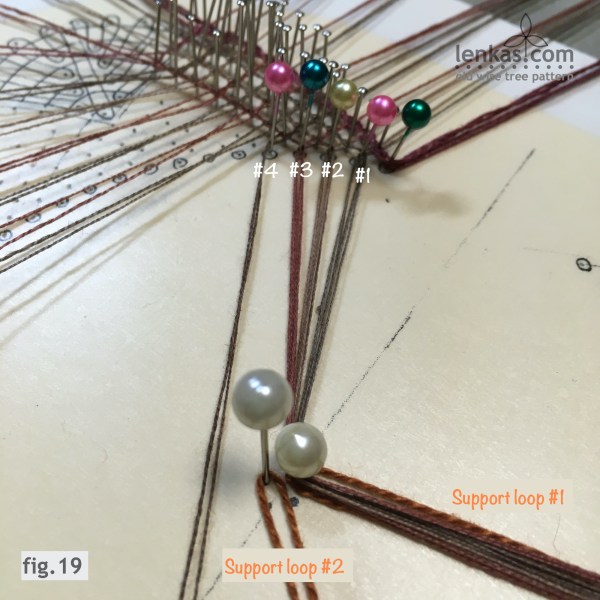
The footside support pin #4 (pink) starts the next group of three footside pairs whose threads will be gathered in the centre using the second support loop.

Collect the treads from the footside pair#4 in this clip.

Pin the second wonder clip to the pillow. Re-use it to collect threads released from footside pairs#5 (white support pin) and #6 (green support pin).
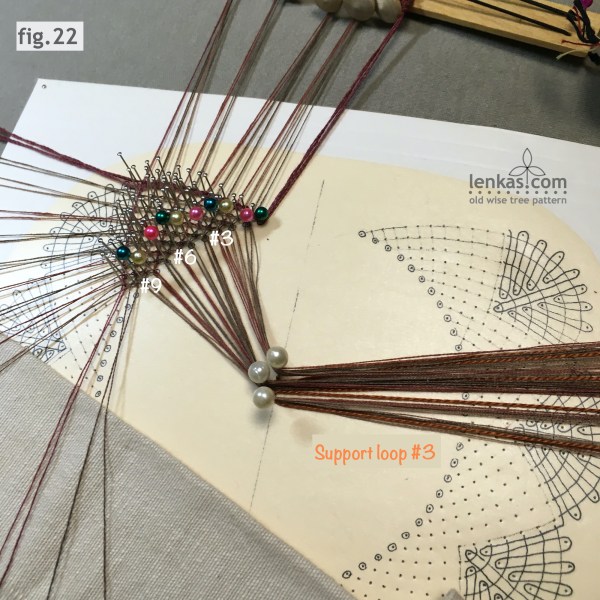
Footside pairs #7, 8 and 9 are gathered using the third wonder clip. Alternating three colours of footside support pins make it easy to keep track – the green pin (#3, #6, #9, … ) always marks the third pair which completes one group. Pink pin starts a new one.
After the green footside pin #9, all support loops are full.

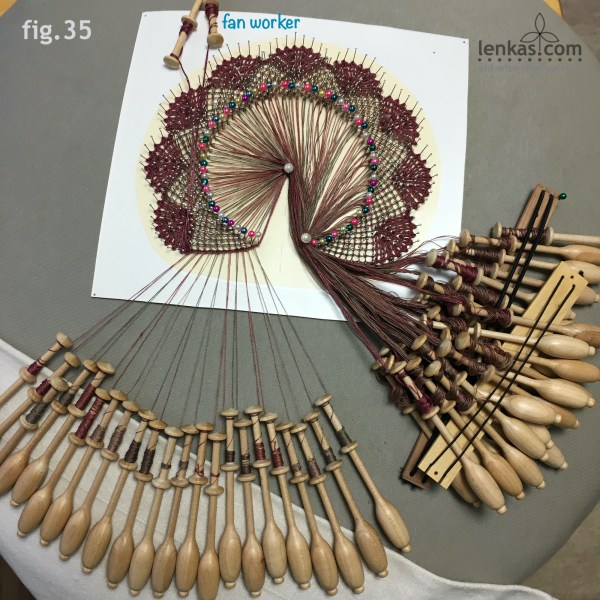
The first torchon ground segment is completed and all pairs are ready for the headside fan. Add the worker pair and make the fan. In the sample, a rather thick worker was used (2ply Barkonie linen 50/4) and that determined the stitches – see the Working Diagram. Other combinations of the fan stitches are possible, depending on the material.

When the fan is finished, make sure that the following row of torchon ground ends with Brussels ground stitch (CTCT-pin-CTCT). This will keep the thick outline pair on the headside, ready to outline the next fan.
It is now time to make space for more threads in the centre. Unpin all three divider pins and release the support loops.
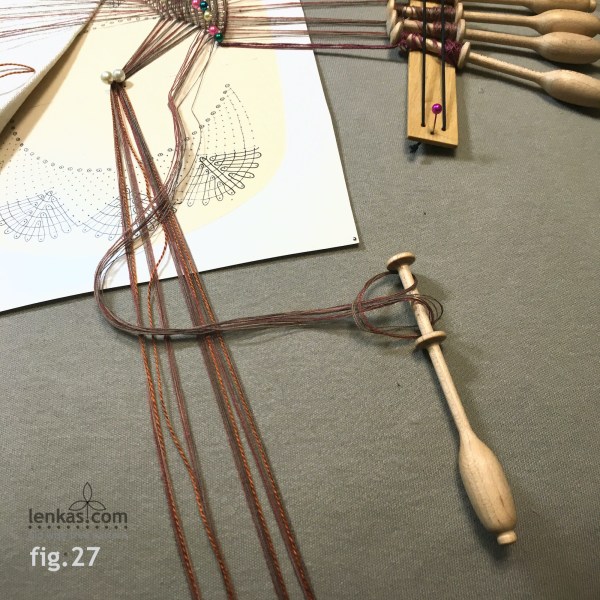
Use one support bobbin for each group of collected threads. Attach threads with the cow hitch and wind them on the bobbin.

A single hitch is enough to keep the threads on the bobbin.

Three groups of threads wound on three support bobbins.

Put away the support bobbins by adding them to the bobbin holder.

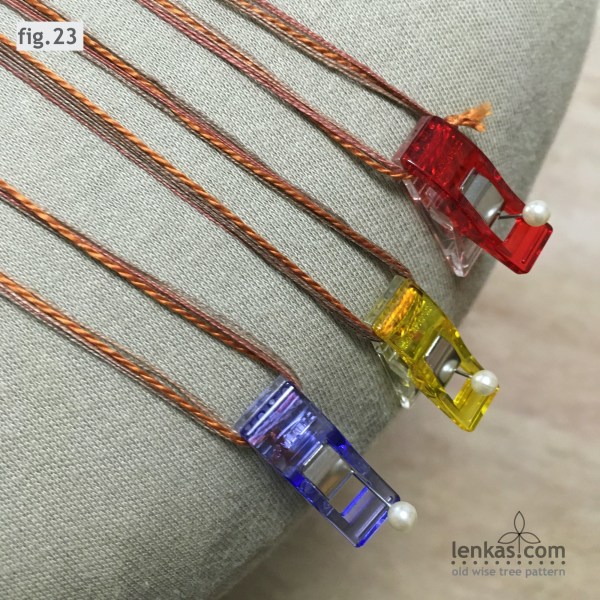
Support loop #1 is re-pinned in the centre – it will collect threads of footside pair #10, 11 and 12.

Second and third support loops follow as the process is repeated.

In case that a pair runs out of thread, it is easy to bring in a new pair on the footside. Add the short pair and the new pair to the same wonder clip and continue with the work.
Torchon lace completed.

In the last row, the outline pair is worked through all ground pairs to reach the footside.

After the last row, divide the ground pairs in four groups (2-3-3-3 pairs) and wind the threads on support bobbins.
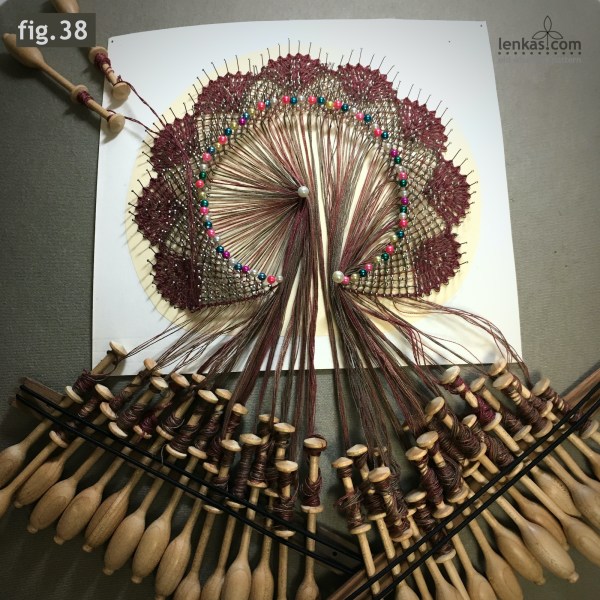
With an exception of the worker, all threads are wound on the support bobbins.
Secure the worker with a few knots and cut it off.

Fibre lace might need starching, especially when it is made from soft threads. Stiffened lace will be easier to transfer and mount onto the background. Push all pins down, except the three inner concentric rows (support pins row + two rows). Starch only the section of lace where the pins are pressed down. While the stiffened lace will hold its shape, the inner threads that will remain soft will be able to relax and distort a little bit. This subtle detail will make progression between lace and branches more fluid and natural.
PART 2 Preparations <<< previous next >>> PART 4 Branches and Trunk
PART 1|PART 2| PART 3| PART 4 |PART 5 |PART 6
