 Lenka's Way of Lace
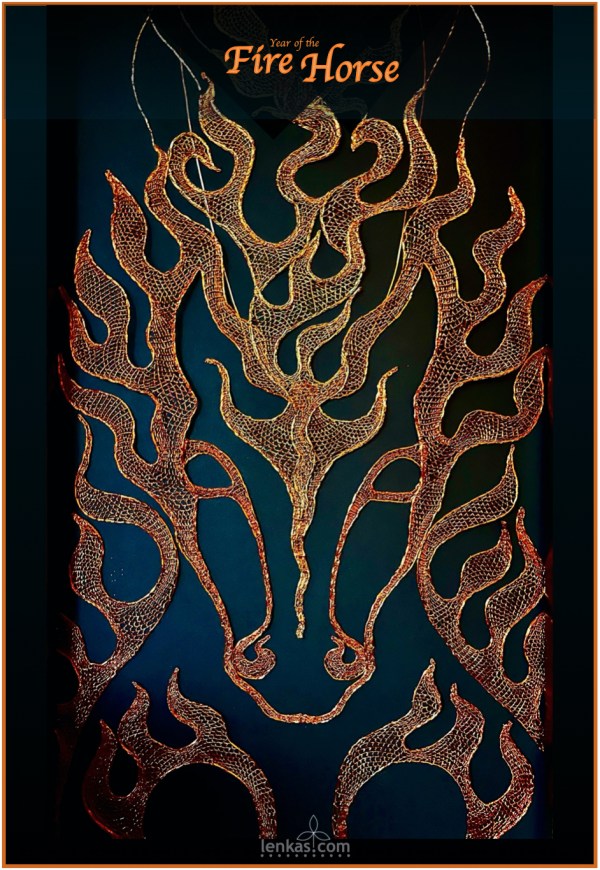
Year of the Fire Horse
Posted on February 26, 2026
February 2026
First time I heard about the Year of the Fire Horse was twenty years ago. In one of the chance encounters that make artistic life so interesting, I met a writer and a film director Julia Kwan, who was then promoting her new feature film “Eve and the Fire Horse”. A sweet and gentle story about a gifted nine-year-old girl growing up in a Chinese immigrant family in Vancouver opened hearts of local audiences, because it allowed us to see the challenges of our mixed multicultural society through the eyes of an innocent child. Eve used her wild imagination to process influences coming from all sides and make sense of the world around her. She was born in the year of the Fire Horse, which happens only once in sixty years, and according to the old Chinese superstition brings misfortune and troubles to girls. Eve’s vivid dreams blend with reality as she creates her own world of wonder, acceptance and love.
This introduction prompted me to look at the Chinese Lunar Calendar and I was surprised by its long tradition. For millenia, before it got corrupted into a mere superficial fortune telling, the calendar offered a very complex guide based on a Taoist view of the world and the Universe. The system was devised to help people understand and balance their existence in harmony with the planetary cycles. Twelve archetypes symbolized by the animals interacting with five earthly elements explain a multitude of possible energy manifestation in material and spiritual realms. The calendar still holds the ancient wisdom for seekers of today. In comparison, our modern calendar seems rather soulless, as the time is now being kept by exceedingly precise machines that have absoulutely no interest in human life.
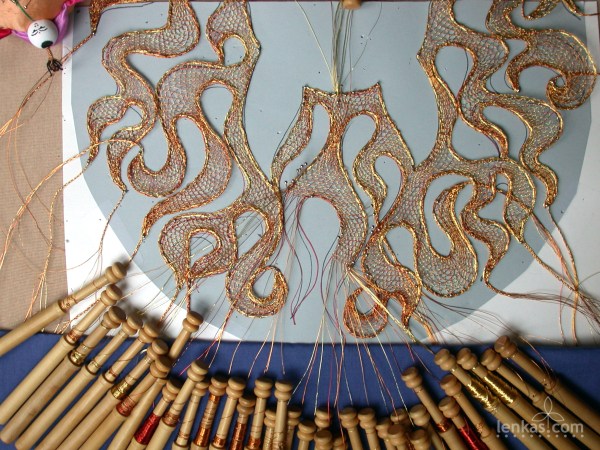
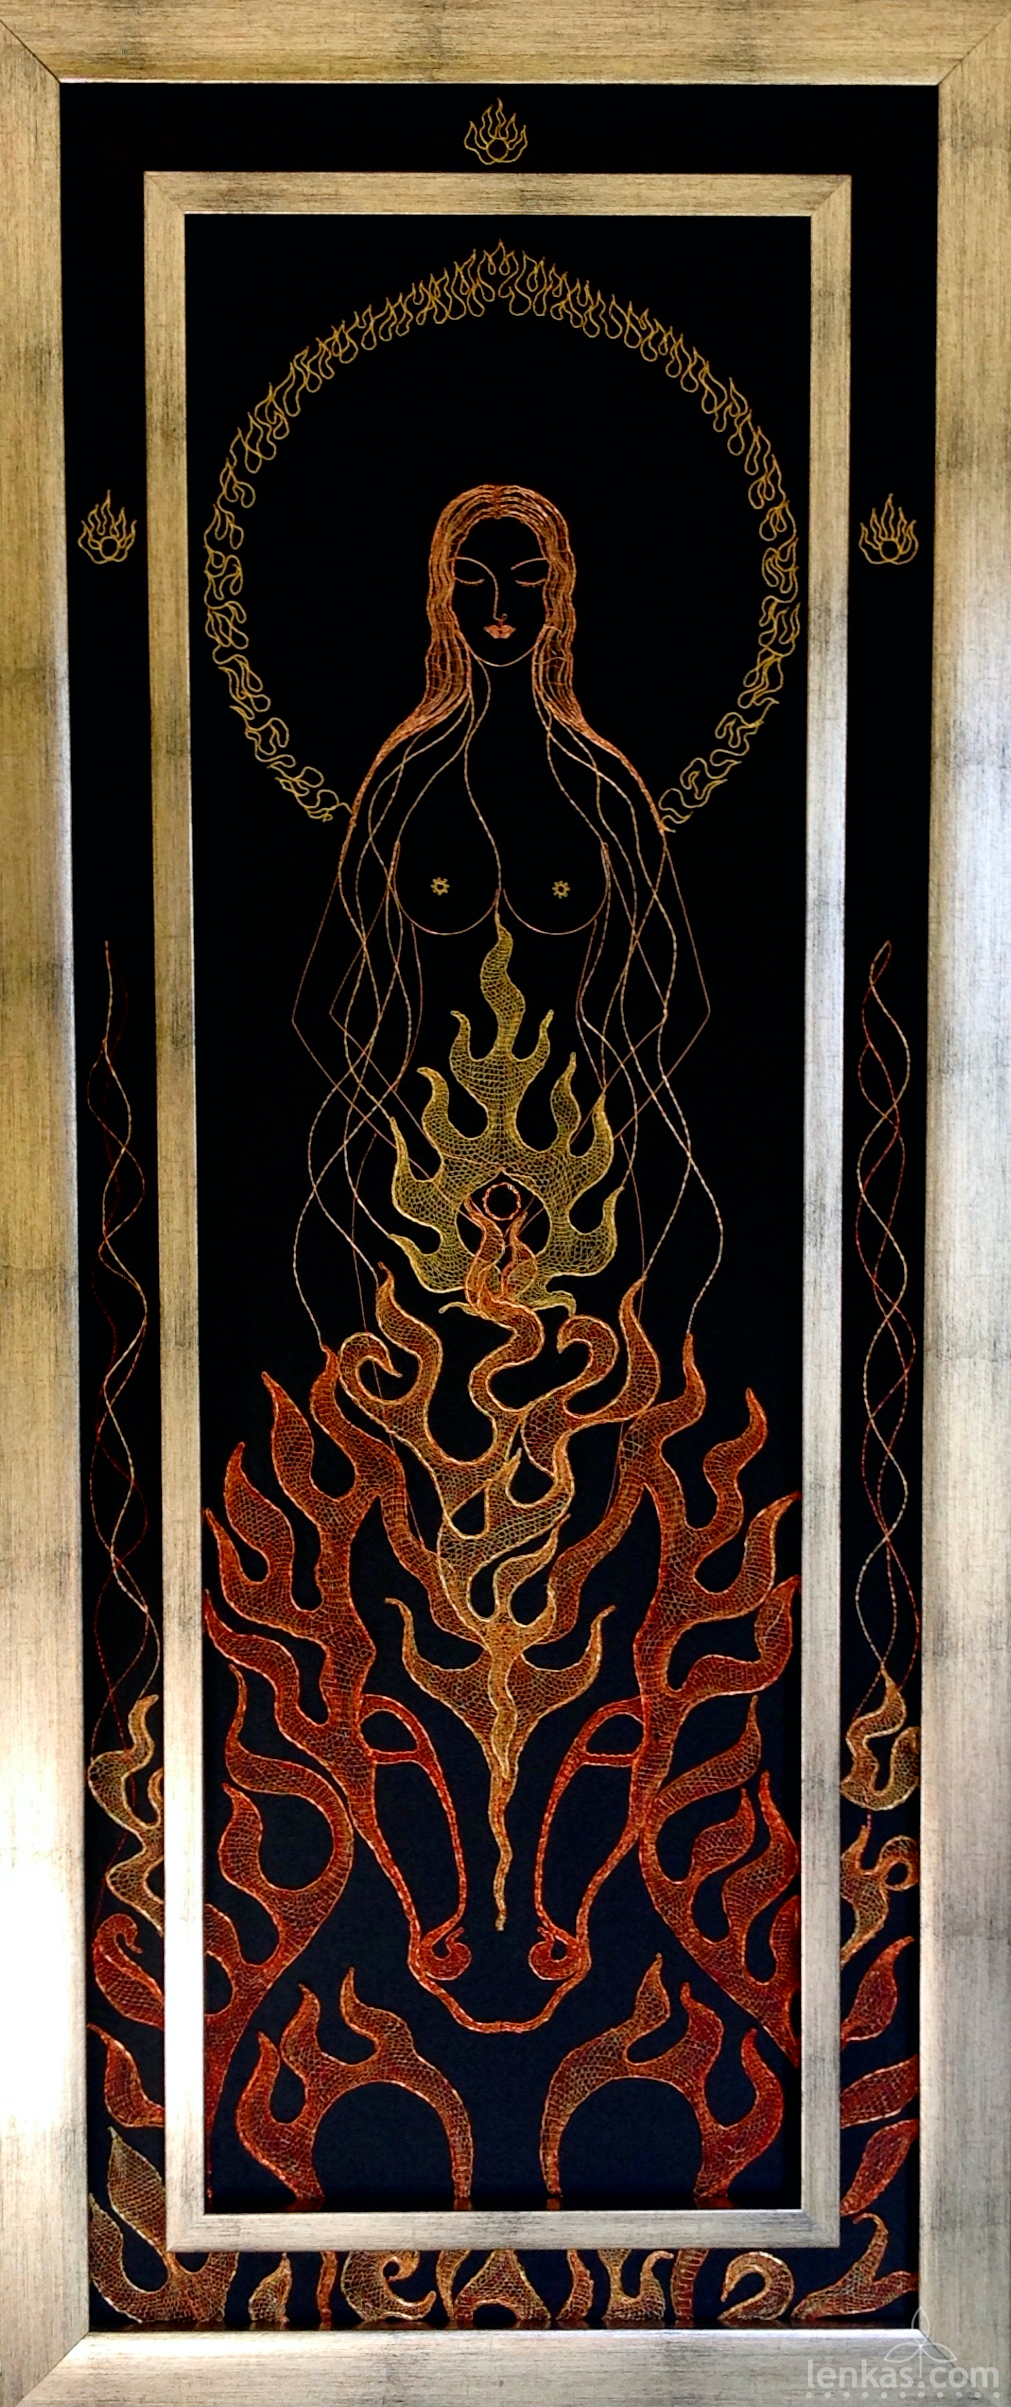
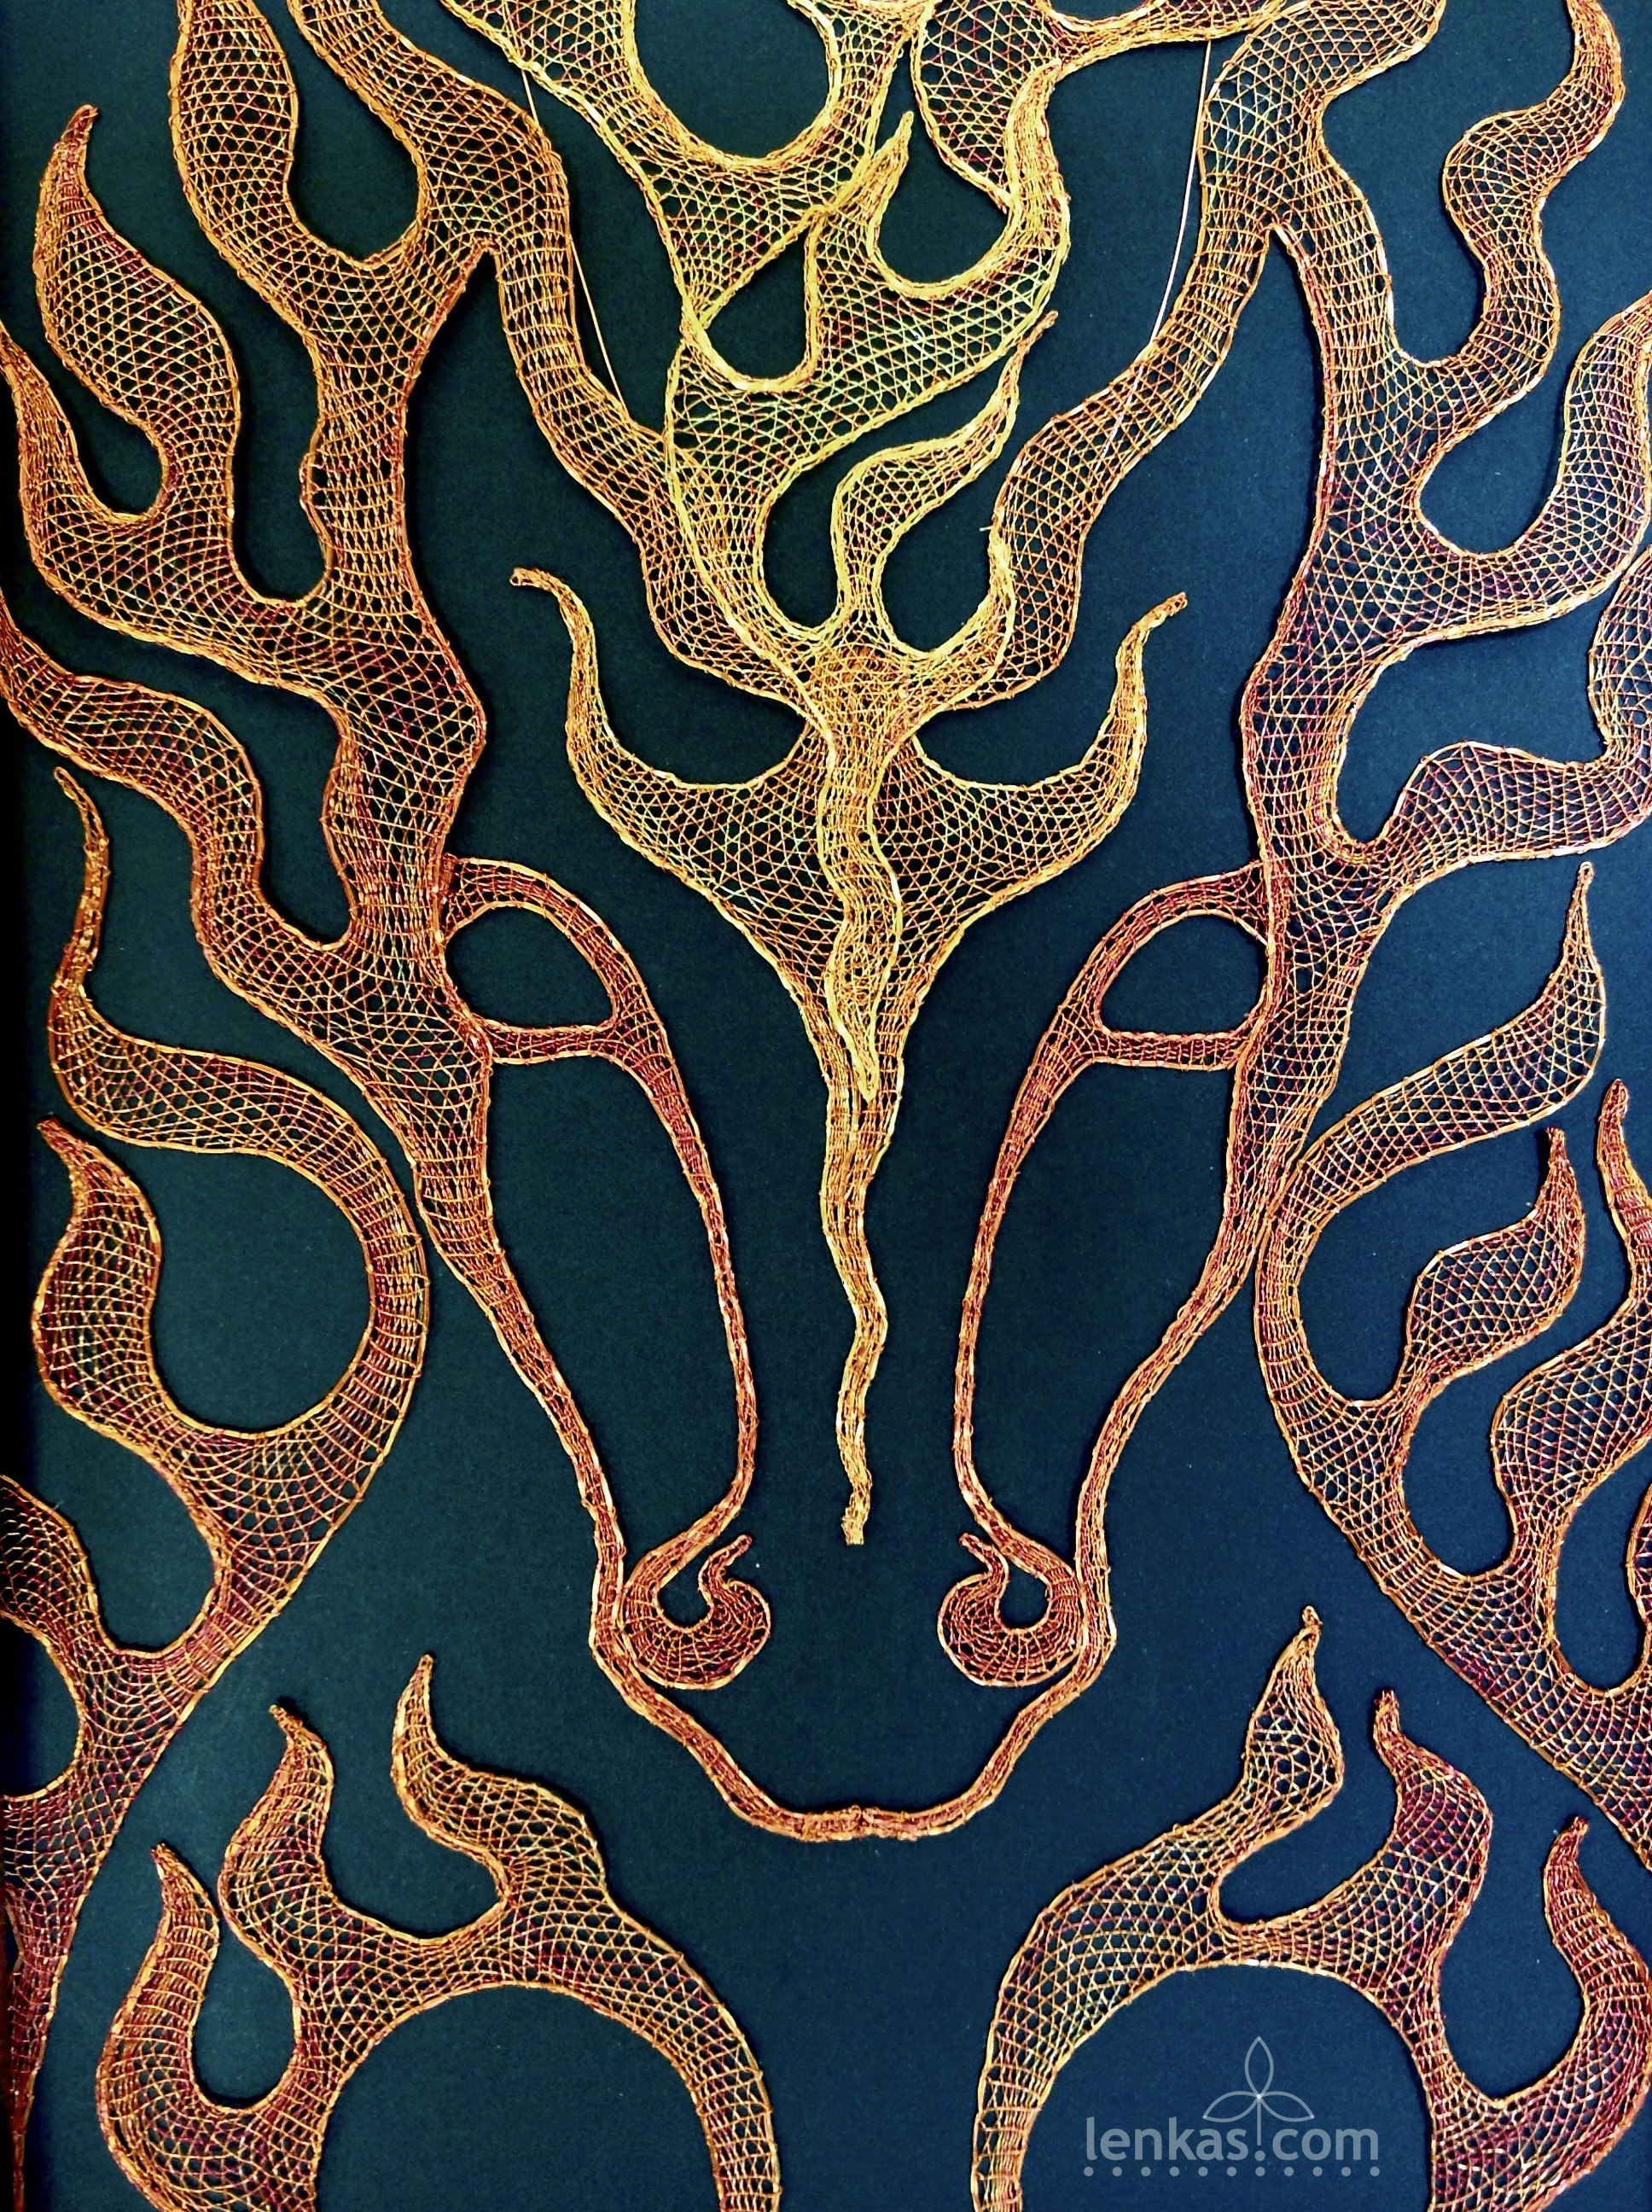
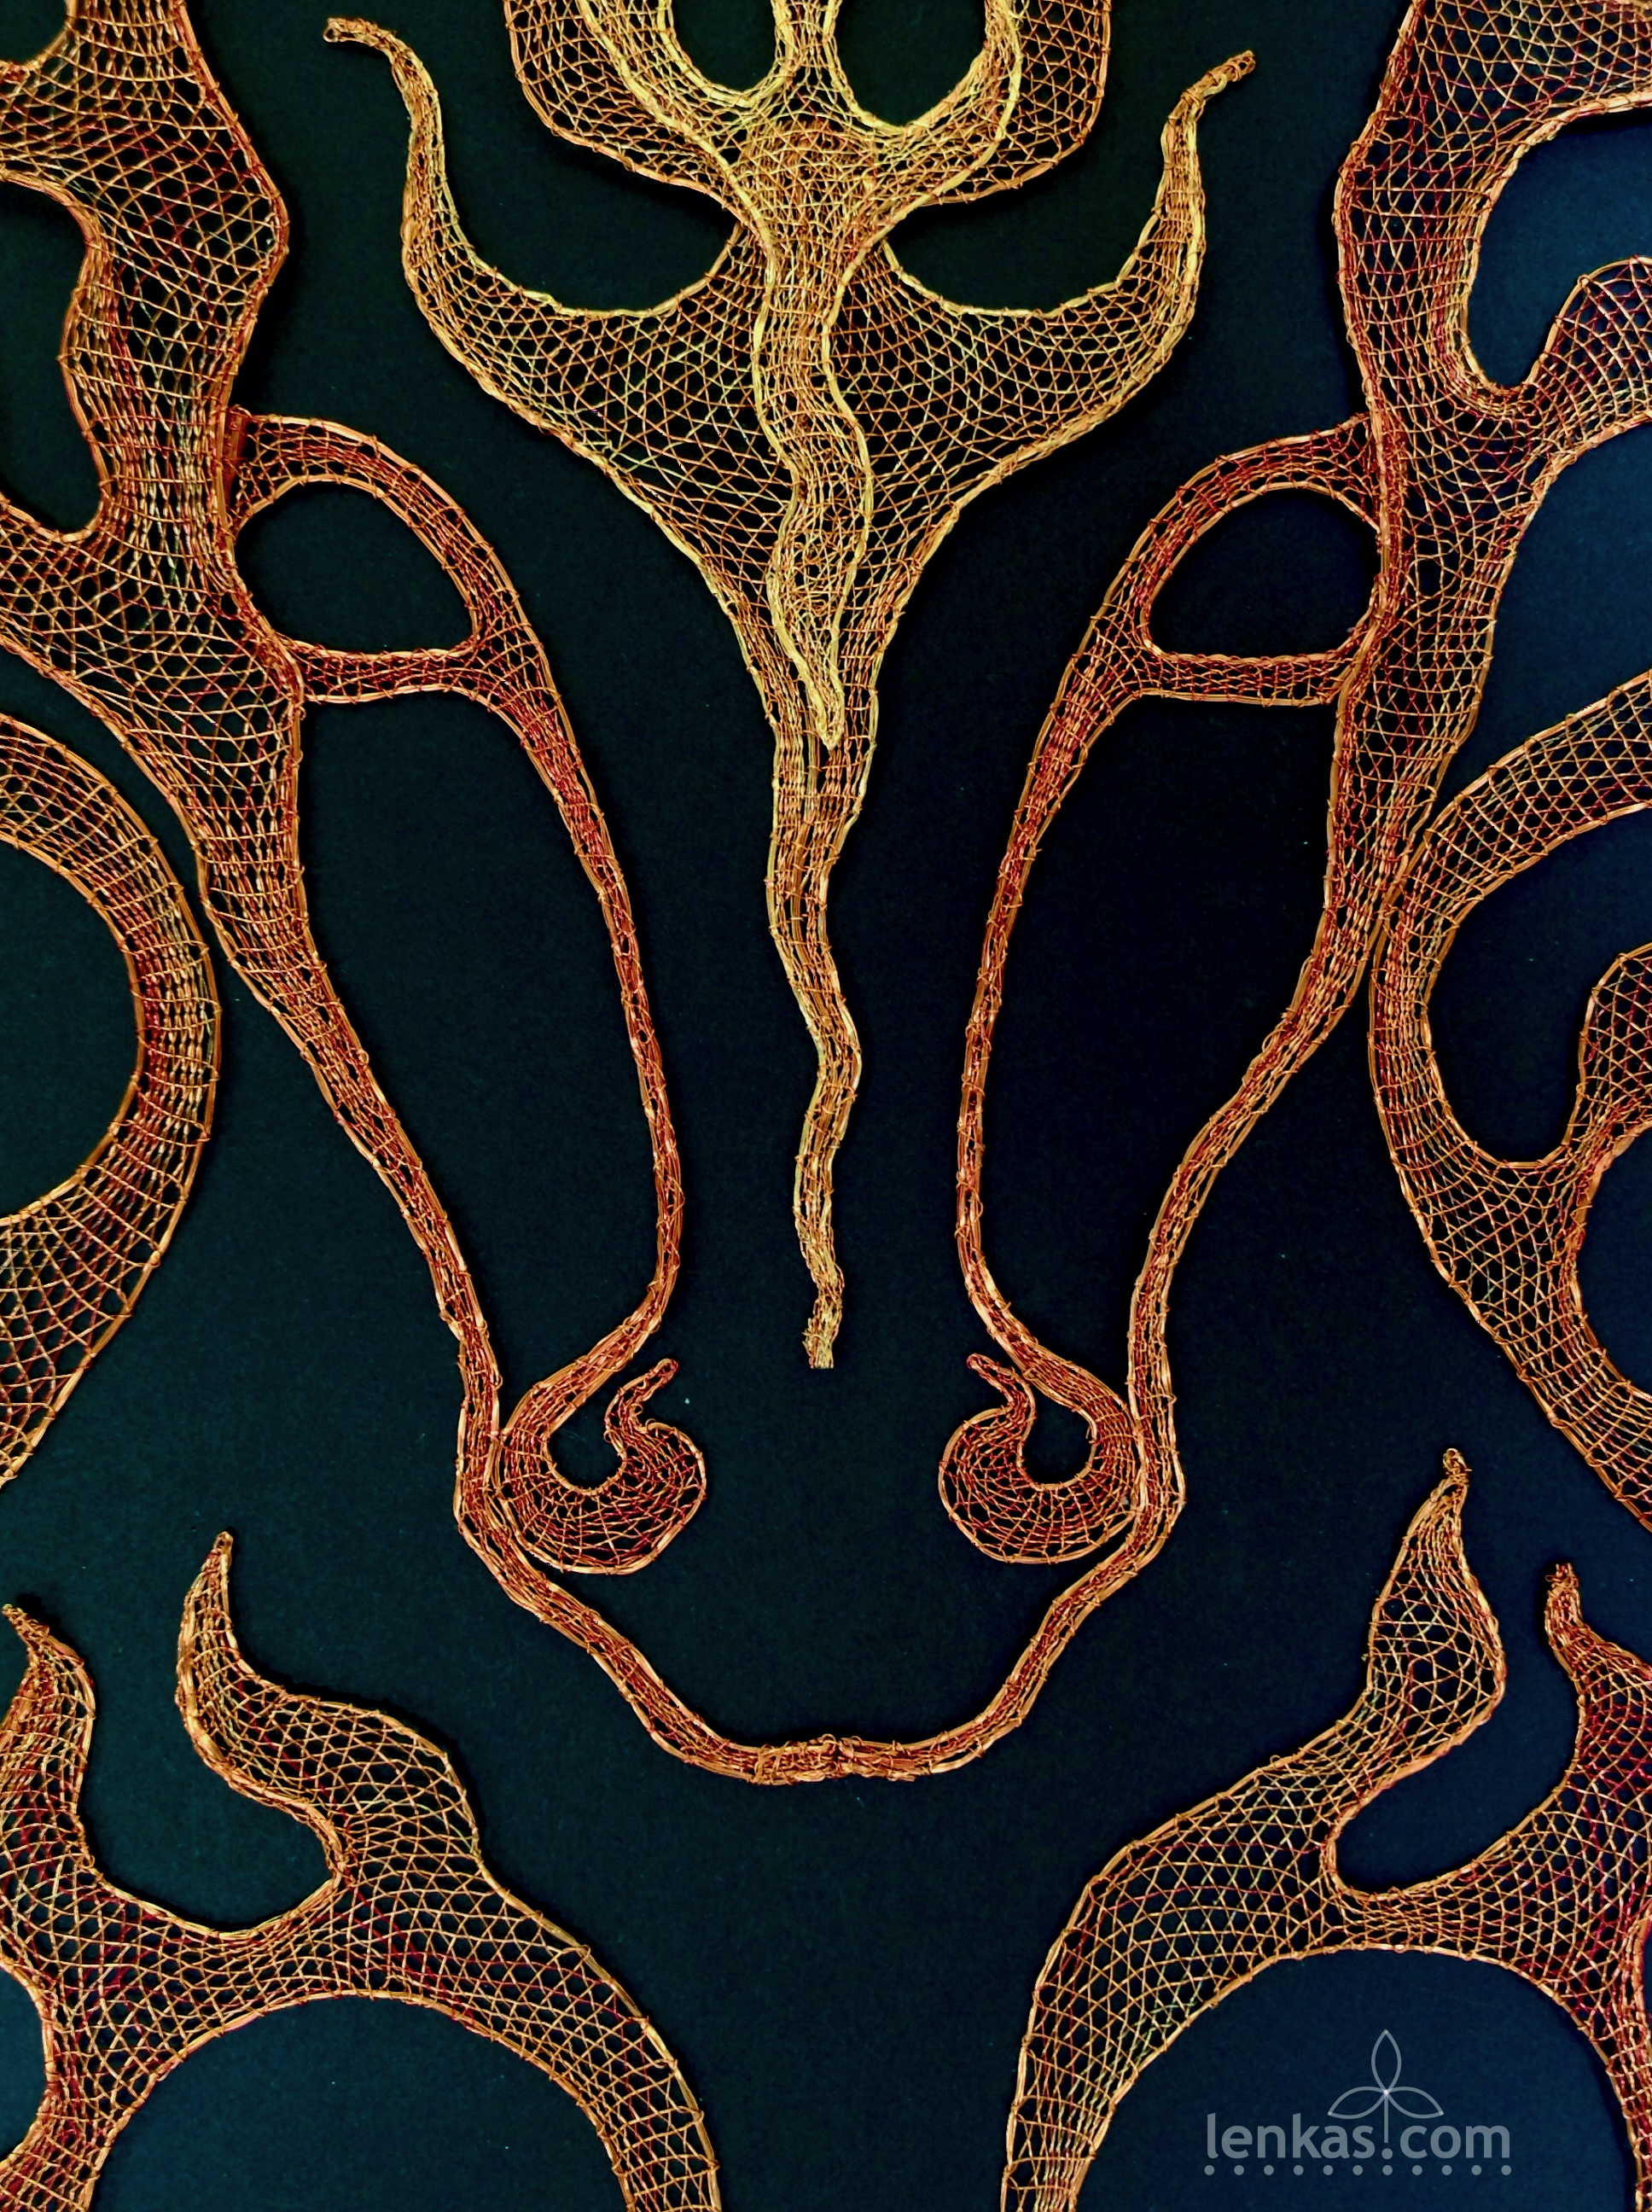
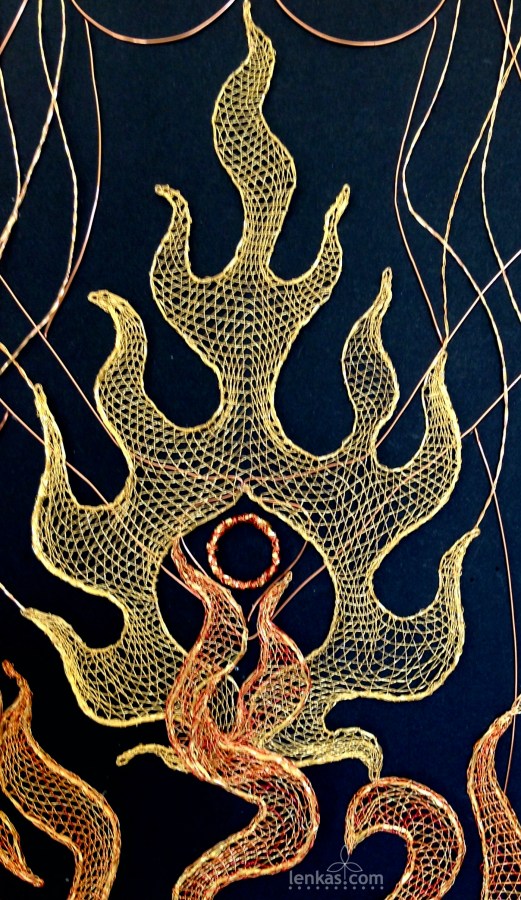
The second encounter with the Fire Horse came years later, when I was working on the third panel for the Venus Triptych, dedicated to the Divine Feminine manifestation through the fire element. In the ancient European mythology, the fire horse represented destruction and at the same time purification that prepares grounds for renewal. It was a very interesting project. Wire in multiple colours blended in a simple half stitch pattern, creating a fiery surge against the dark negative space. I still remember the intensity of the work so focused that it at times felt like being consumed by the flames. Interestingly, when the viewers look at the picture, they often see the flames, without noticing the horse. Once they realize it is there, they can’t take their eyes away from the fiery creature.
The third rendezvous is happening now: the Year of the Fire Horse just started and it will undoubtedly bring a lot of raw energy and many passionate moments. While the sheer power of the fire element in high speed motion might seem frightening, with the right intention and focus it can be harnessed to deliver profound transformations.
We are in for a wild ride !
Happy Birthday, Julia !!
And a happy, visionary and fertile year to all fearlessly creative artists, including the gentle but high-spirited lacemakers !!!
Spring Chickens and Eggs
Posted on April 2, 2025
April 2, 2025
Spring has arrived and I feel like celebrating… sprouting, growing and blooming with plants, chirping and singing with birds, building nests and taking care of eggs… Chicken eggs in particular!
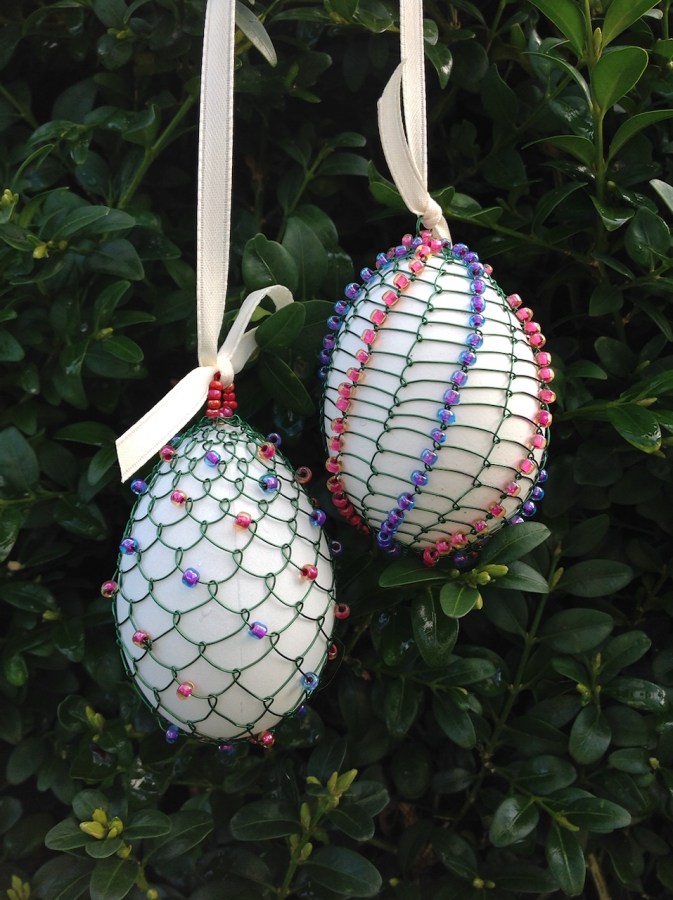
It must be my Slavic roots drawing me back to spring festivals of pagan tribes. In their spring rites, the eggs symbolized fertility, new life and abundance. Tradition of decorating eggs survived from ancient times through successive generations of girls who learned the delicate art from their mothers and grandmothers. Every region has a specific method – wax painting or resist dying, scratching, straw applications, perforating, and even wire wrapping – and there are as many original patterns as there are girls. Each saves the best egg for a boy that is close to her heart.
I think that’s one of the reason why this tradition is still alive. Love is perpetual!
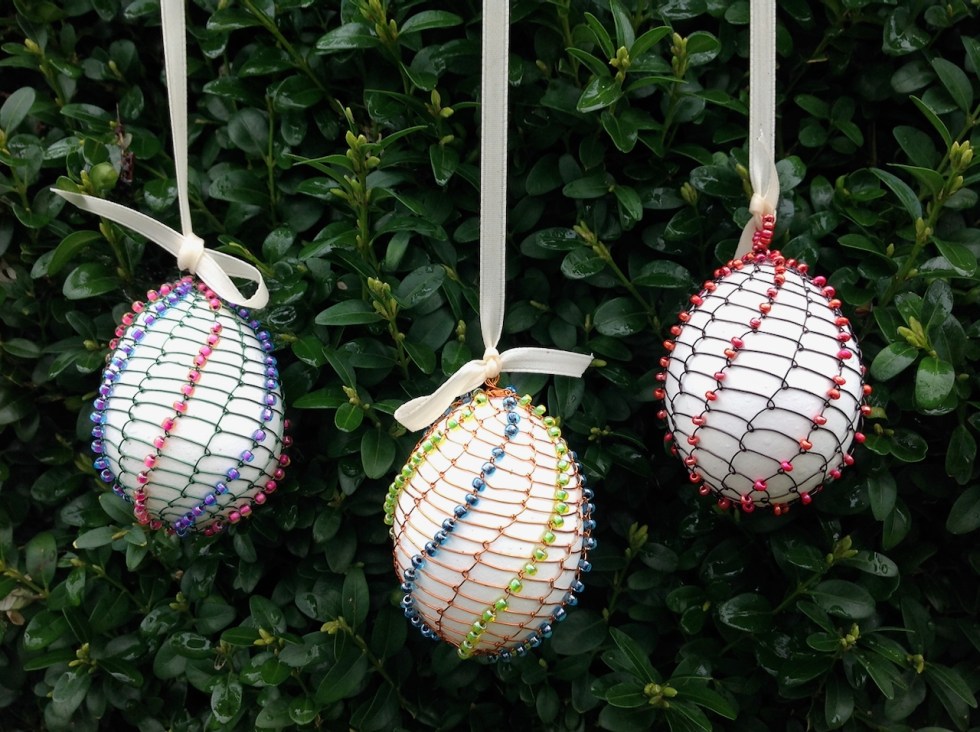
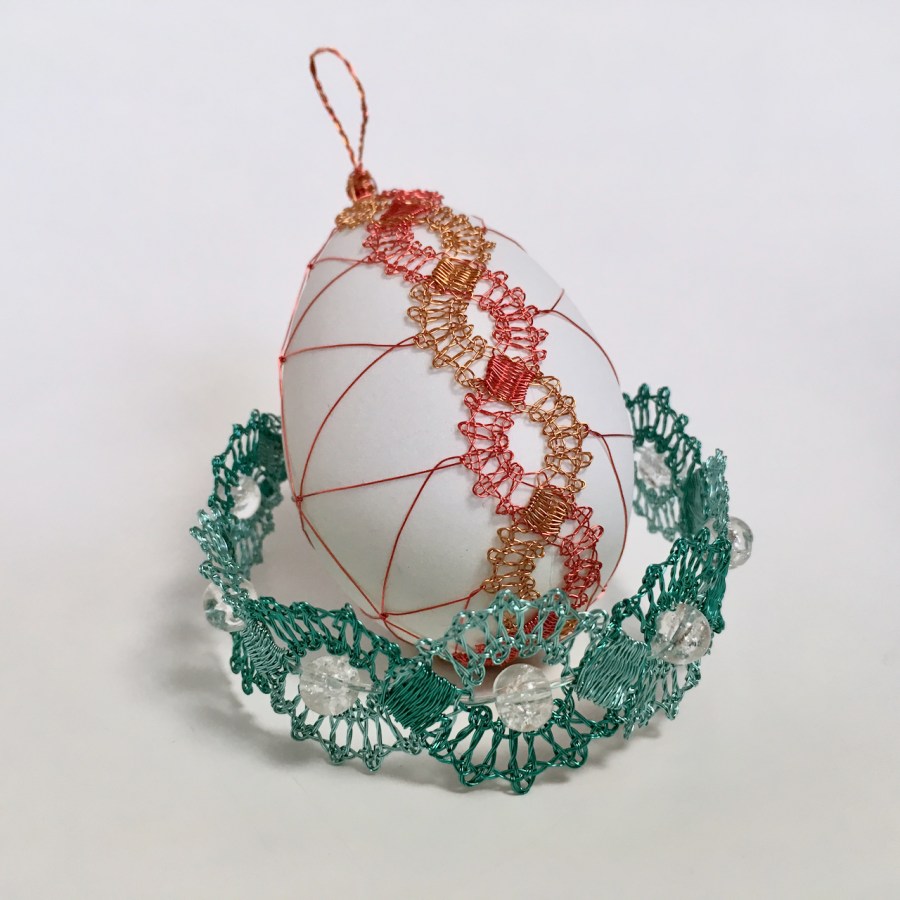
Of course, I couldn’t resist the idea of decorating eggs with wire lace, bobbin and needle, and both techniques worked out beautifully. The small scale designs are fun to make for beginners and experienced lacemakers alike. I believe that Spring and Easter decorations are more meaningful when they are made by hand, especially when they are intended for special gift giving.
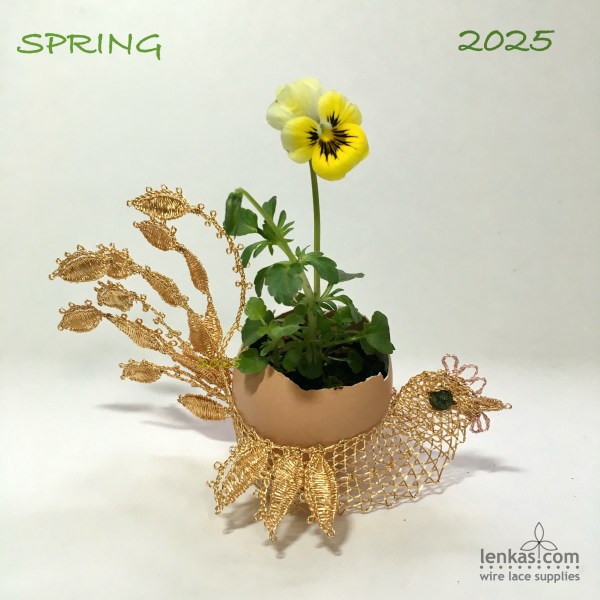
My favourite pattern is the Chicken Egg Stand because it holds a lot of creative potential for egg variations. While the stand remains the same, its content changes the overall decorative effect.
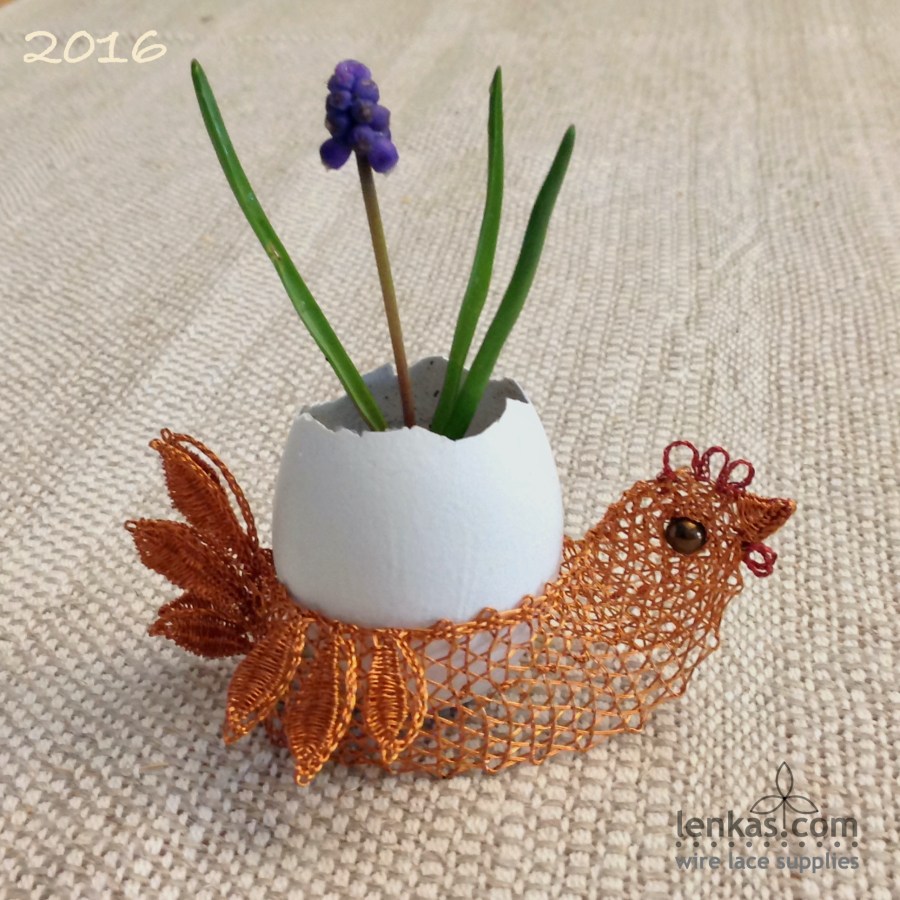
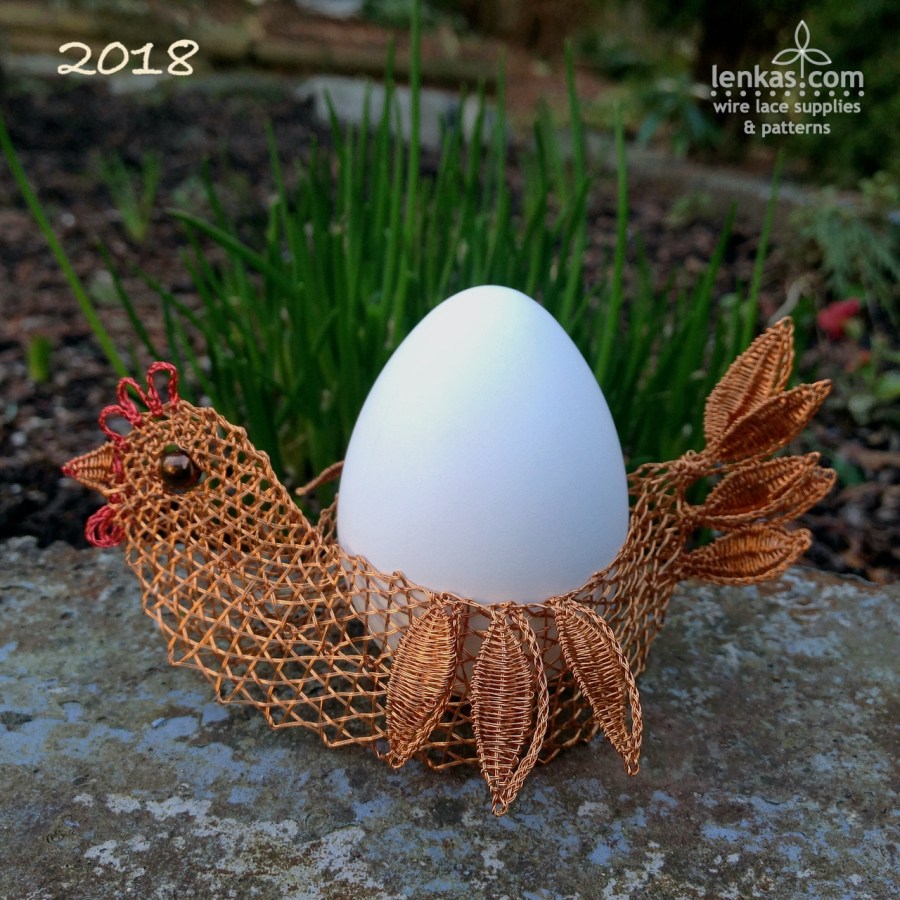

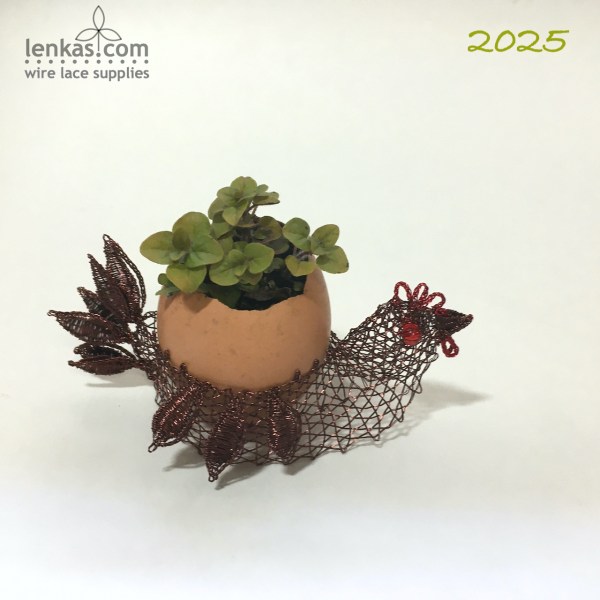
Every year my lace chickens are curious how their eggs will look like as we search in the garden to see what we find. This year it’s violas! So many self seeded all over the place and the tiny plants fit perfectly into hollow egg shells. Carefully transplanted, they look very cute in their miniature pots, sitting in the Chicken bases. It is fun to water them daily and wait for the flowers to open. What colours are they going to be?


One Chicken, a dark brown Buckeye, carries an oregano seedling for my friend’s new herb patch. For good luck!
When the plants outgrow their temporary home they will be transferred to the outside pots or beds. The egg shells crushed to small pieces will released calcium carbonate and enrich the soil with essential elements. The plants will grow and blossom all summer long. Seedlings that won’t get transplanted will be composted, so there will be no waste. Mother Nature will be pleased.
The lace chickens will then return to their envelope to rest until next year. Unlike my other Spring/Easter decorations they store flat, taking up hardly any space.
I am so glad to have them, we enjoy each other’s company during all lovely festivities, spring after spring!

Over the years, I designed more lace egg decorations, mostly as workshop projects, and I see potential for many more.

But sometimes I feel that my “eggthusiasm” is a bit displaced. After all, I have lived in a different part of the world for a long time. Maybe I should start to think about lacy Easter Bunnies 🙂
Cheers to all creative spring ideas, wherever and however they manifest!
Lenka
Year of the Snake
Posted on January 28, 2025
January 29, 2025

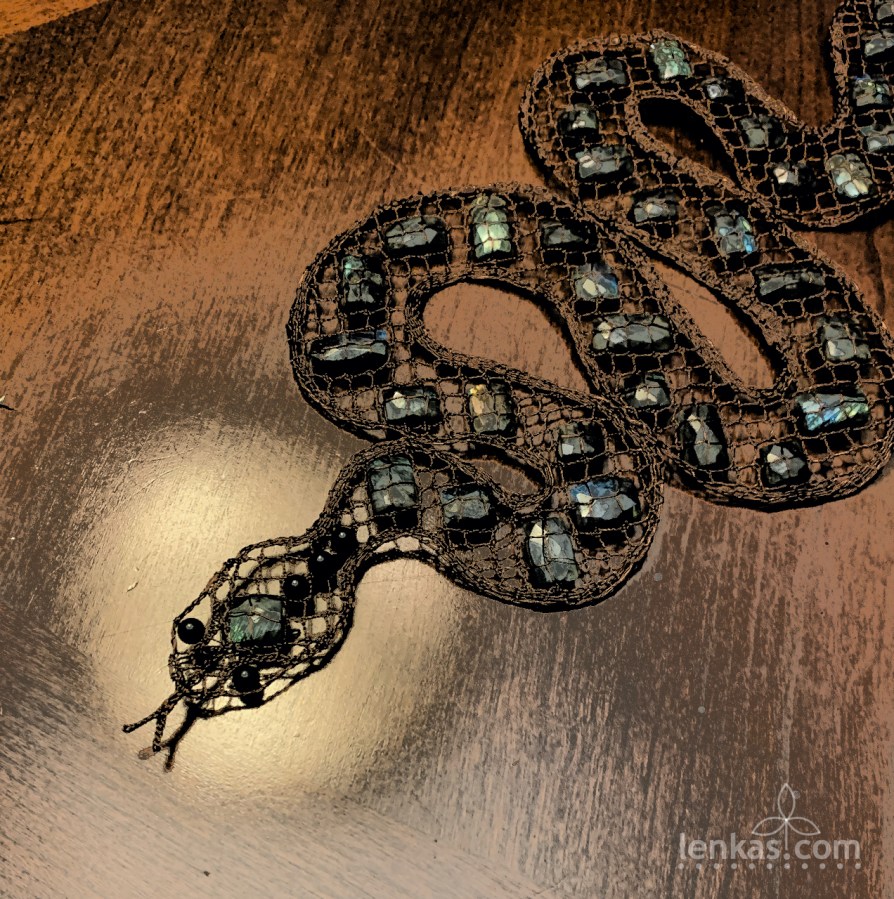
Snake in enamelled copper with labradorite stones – tape lace with torchon ground filling.


Turn Your Flowers into Stars
Posted on November 25, 2024
November 25, 2024
The only flowers left in my yard are lovely and hardy Calendulas, and as the temperature is falling bit by bit every day, even they will be gone soon. In summertime I found so much pleasure in observing and caring for flora around me and now time has come for good rest. I am looking forward to long winter nights to turn my gaze up to the stars. Heavenly contemplation always fills me with wonder and deep gratitude… and lots of creative ideas.
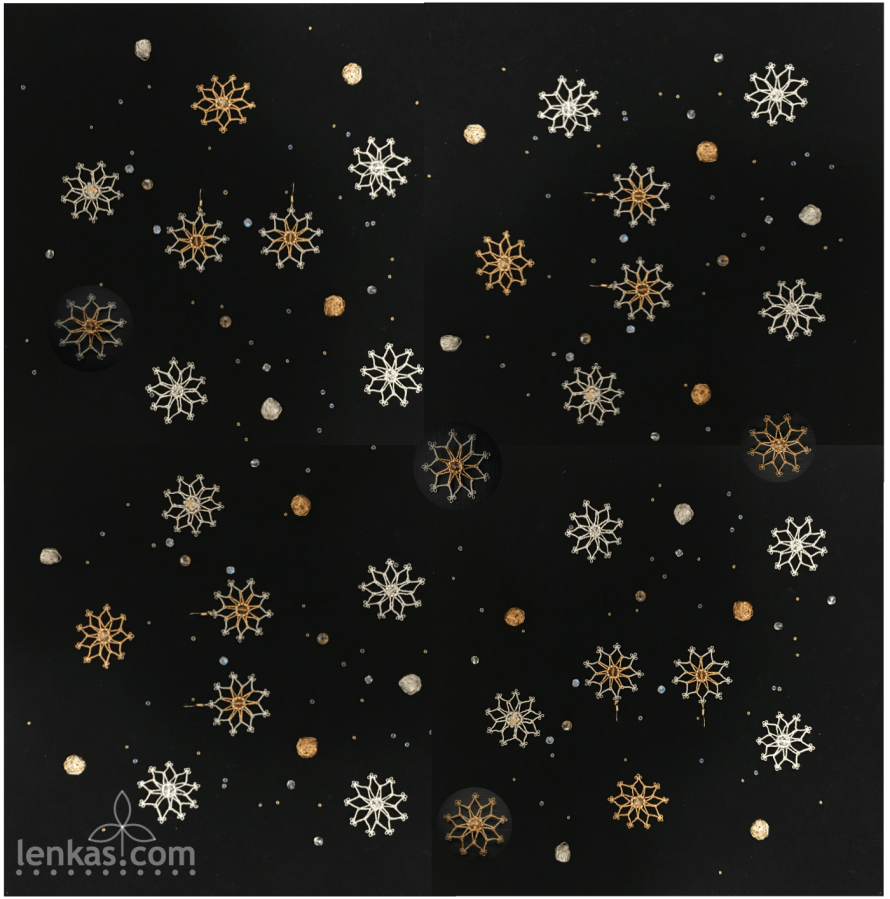
Let’s muse on… how about turning the Flowers into Stars?

It’s easy. With a few simple modifications the Flower Earrings Pattern will produce delicate stars.
All what we need is a couple meters of shiny wires, a dash of sparkling beads, six bobbins and a pillow, and a quiet afternoon. By twilight, our first stars will be ready to shine!
Here is how:
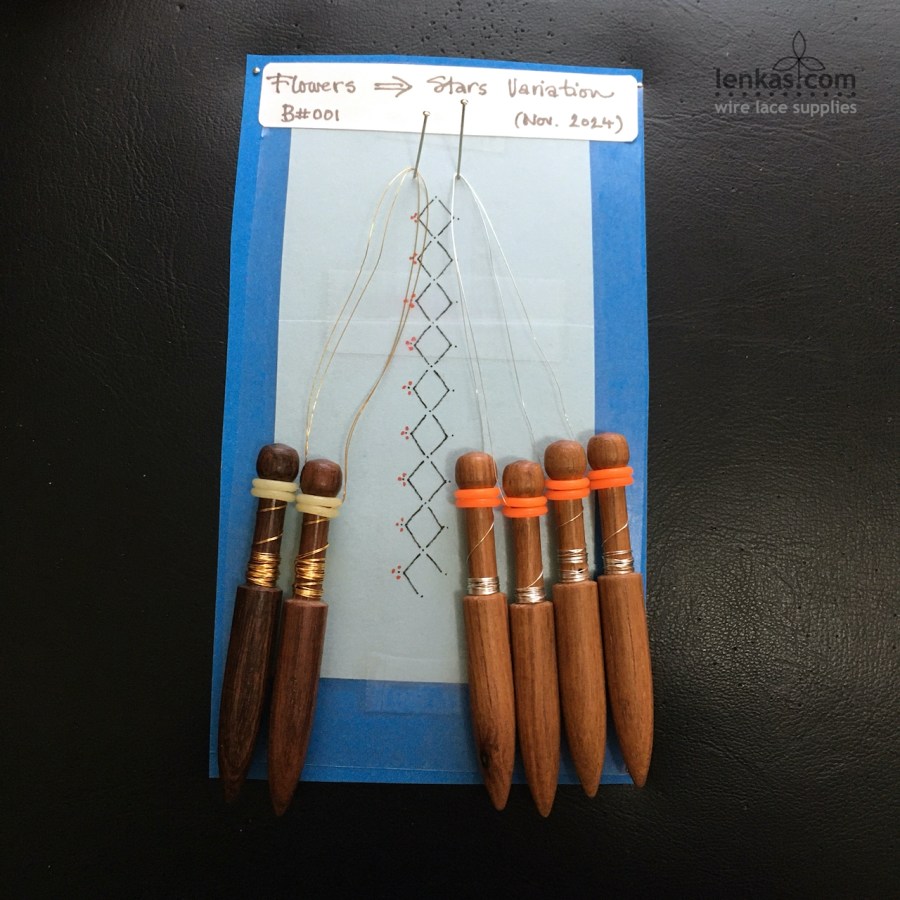
1. Extend the pricking
Print two copies of a pricking A (page 3), and cut and paste them together to get nine repeats of the pattern. The original flower pricking had six repeats and we are adding three more.
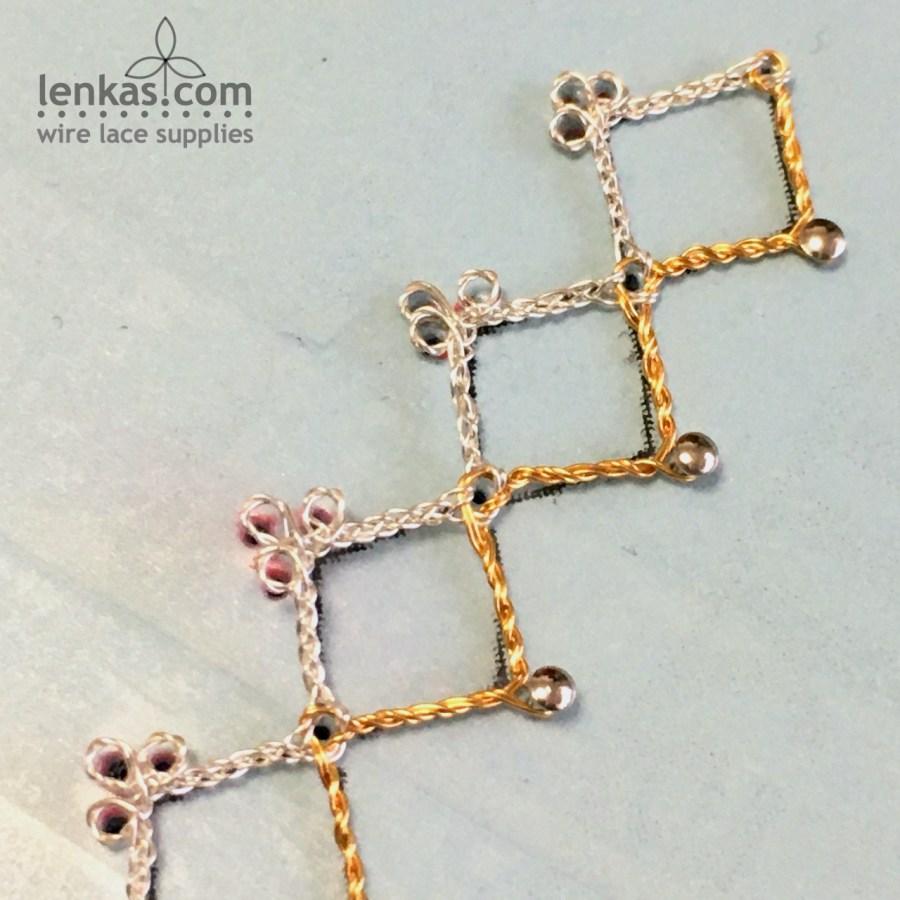
2. Add extra dots on pricking for triple picot
As opposed to flower design, the star has three picots at the tips, so it can shine and radiate light. Add three dots evenly around the original single picot dot.


3. Change quantity of bobbins
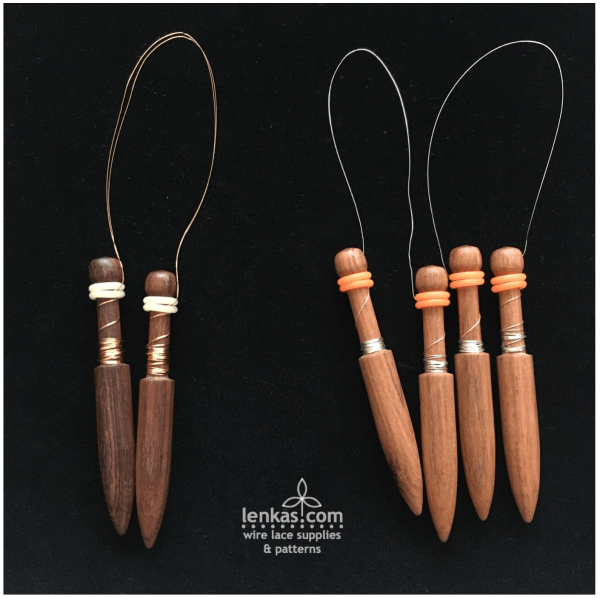
To simplify things and also to make the centre of the future star stronger, two pairs of single-wound bobbins will be replaced by one double-wound pair. So instead of four equal pairs we will work with just three:
– 2 pairs with single wire, 40cm on each bobbin (about 16”)
– 1 pair with double wire, 40cm on each bobbin (about 16”)
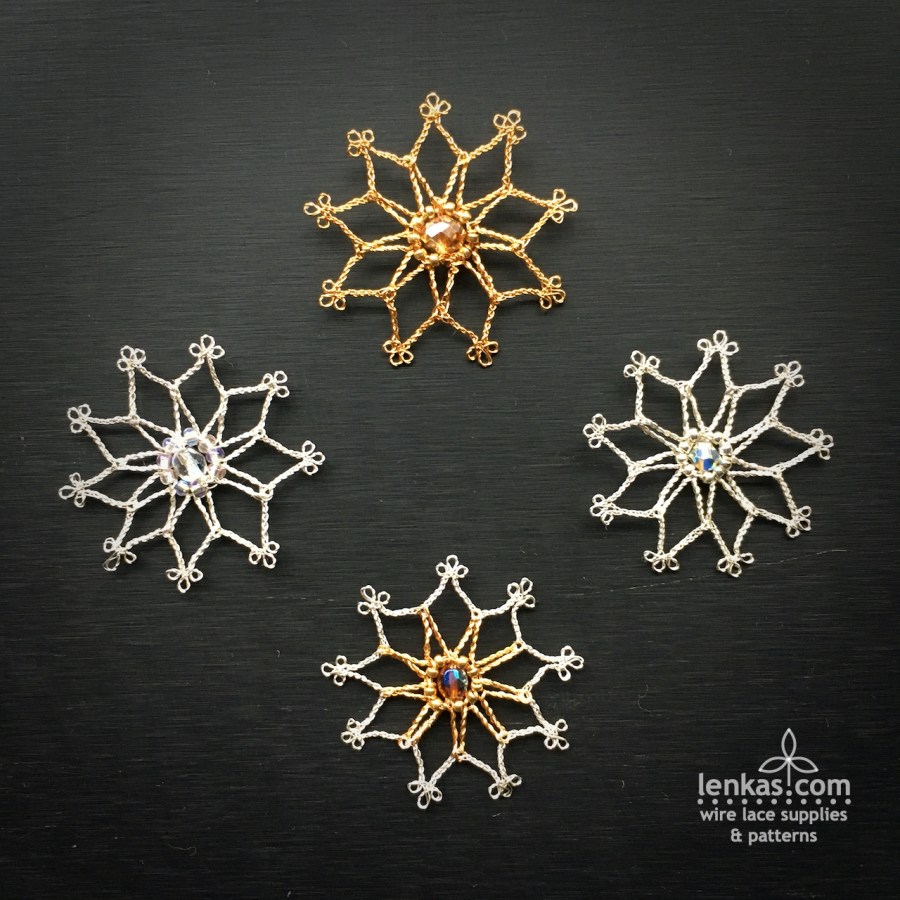
All together, there are the same number of wires (8), distributed differently on three pairs instead of four. For clarity, I used two different colours in the sample, silver for single wire pairs and gold for double wire pair. But of course, they can all be the same colour.
4. To finish the star, smaller seed beads are needed – size 10/0 or 11/0 or 15/0 – and one large bead for the centre of the star – 4 or 6mm round or faceted bi-cone.
Let’s start working:
Keep the Flower Earring Pattern on hand for reference.
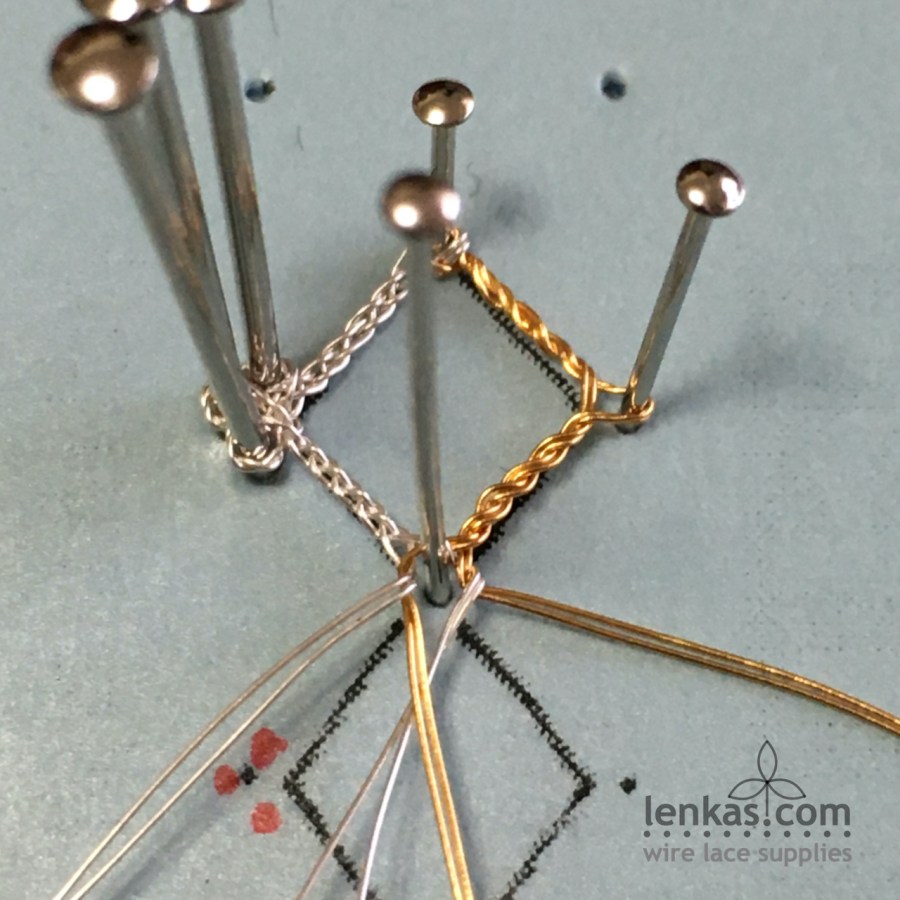
1. Hang a double pair on left support pin and two single pairs on right support pin, one on top of the other.
2. Work a regular windmill (see page 7). It will be a little bit easier, because the gold wires are wound only on one pair. Stitch steps are the same: Cross-Twist-pin-Cross-tension.
3. After the windmill, work with the gold double pair on right side, Twist and tension firmly, then repeat five more times to get six twists in total. Lots of twist for a short distance, but with firm tensioning you should be able to fit them all in. If it’s a struggle, just five twists will do, but six of them give stronger support. Place pin. Twist-tension six times.


4. On the headside, work a braid with two pairs, then make a triple picot. Triple picot is made of three regular picots, separated by a cloth stitch. Make the first picot, either scooped or wrapped (see page 11-12), C-T-C-tension, make the second picot, C-T-C-tension, make third picot, C-T-C-tension and continue with the braid towards the next windmill crossing.
5. This windmill crossing and all remaining ones in the pattern are worked as Windmill with a Twist (see page 9 for full explanation). Cross-Twist-pin-Twist-tension-Cross-tension. The extra twist in the middle of crossing will keep the single (silver) pairs on the headside and the double (gold) pair on the footside.
Keep repeating the steps until the end of pattern.

Beading and finishing is the same as the Flower (see page 17, and page 23).

A tip for finishing two coloured star:
Connecting the end and start points to complete the circle is done with two outer pairs, which are then braided towards the centre. It means that this last braid will be a “wrong” colour (silver in the sample). To cover that irregularity, use one of the gold wires, lead it towards the start/end windmill, thread the wire through the crossing to secure it there, and then wrap the wire tightly around the silver braid, all the way to the centre of the star. It’s a fiddly job, but worth the effort if you want your star earrings to be perfect.


The star’s final shape will be determined by the size of seed beads in the centre – smaller beads make the centre tighter, while use of bigger seed beads leads to a larger opening. Choose a focal bead that fits in the middle – round or bi-cone faceted crystals in size 4-6mm work well, because they give a nice, sparkly accent to the star. The centre bead also provides ample hiding space for the wire ends, since the seed beads in sizes 10-15/0 are too small to contain all of them.

Add a finishing touch to the star by gently squeezing the braids together under the windmill crossings and triple picots. It will make the rays look sharper and neater.
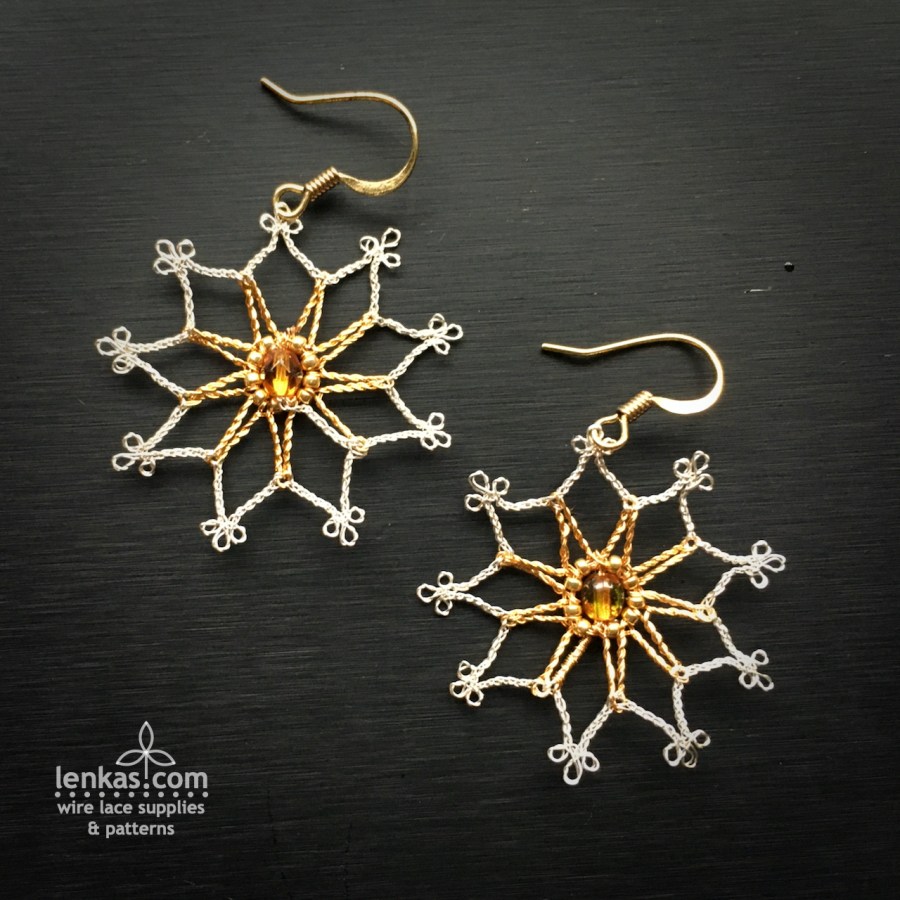
Have fun, play with wires and beads, and make a lot of stars to illuminate the path during winter months. Find ways to distribute them far and wide – on greeting cards, special gift tags or festive ornaments. They are small and delicate, but being handmade, they radiate love and light as if by magic.
If you don’t have the Flower Earrings Pattern & Tutorial yet you might be pleased to know that during Wire Lace Supplies Christmas Sale, from November 26 to December 26, 2024, there is 20% discount on all patterns. Go ahead and give the Flower/Star a try!

Happy lacemaking and star making,
Lenka
Lenka’s Way of Lace Newsletter 1/2018
Posted on February 1, 2018
The first 2018 Newsletter is here and it brings information about lace events that are planned for the next couple of months.

There is nothing better than lacemaking for the winter end months – especially if the projects are in warm tones (see Punto de España workshop) or downright spring colours (see Spring Meadow Egg Stand workshop).
Let’s make lace and get ready to celebrate the sun’s return 🙂
UPCOMING WORKSHOPS

Saturday, February 10, 10;30 am – 5:30 pm
Ocean Park Community Hall, 1577 128th Street, Surrey, BC
One day creative workshop in bobbin lace in wire brings something very new. Traditional Spanish Point Lace (Punto de España) of the late Renaissance and Baroque times had been made in precious metal threads of silver and gold. Numerous royal portraits in major European art collections attest to popularity of this lace in fashion and interior design through centuries. Punto de España patterns are highly suitable for wire medium and offer endless inspiration for jewellery and art object design. This workshop, the first of the Spanish Point lace in the New School of Lace curriculum, offers an introduction to essential design elements of this fabulous technique.
Skill level: intermediate
Registration is still opened, and a few seats available in this workshop. Please register ASAP.

Ocean Park Community Hall,1577 128th Street, Surrey, BC
This workshop is open to all levels. It will guide beginners and experienced lacemakers alike through the basics of cloth stitch weave to a spring meadow with fresh grass and delicate flowers. You will learn how to create a cheerful egg stand – a perfect Easter table decoration or a special gift for coming spring celebrations.Skill level: beginners and intermediate
WEEKLY CLASSES
Weekly classes are well on the way. All lacemakers are doing great, learning many kinds of lace – Idrija tape lace and torchon lace in fibre, point ground lace in fibre and wire, free form wire lace, and lace design in fibre and wire. Monday classes are all full, but there is always possibility to open additional classes on other days, as long as three students agree on the same day and time.
Contact me by phone or email, or visit Weekly Classes page to find more information.
LACE | HEART | ART

Deadline for the 1st International Challenge and Online Exhibition of Handmade Bobbin Lace in Colour is approaching. Entries are arriving from all over the world and we are looking forward to receiving more lace | heart | art by Wednesday, February 14th. Do not wait and send your entry now!
For more information, visit lace | heart | art page.
TALKS, DISPLAYS, DEMOS and OTHER EVENTS
Lace by Lenka the Semiahmoo Library, in South Surrey, BC

Display featuring the New School of Lace will be in the library from February 3rd to March 15th.
Lacemaking demonstration is scheduled for Thursday, January 22nd, from 2 to 5 pm.
Library visitors will get a chance not only to learn about fine craft of lace, and see lacemaking demonstration, but also to win one of the original wire lace Bookworm Bookmarks in a contest!
If you are nearby, please drop in to see the lace display by the entrance door. For those of you who have never been to this library branch, here is a photo I took of the outside wall – it’s alive! And quite beautiful as it changes throughout the year.
Find more information on Surrey Libraries page.
I am happy to share the news that FibresWest 2018 accepted our proposal for a lecture titled
“Lace | Heart | Art : Barb’s Heart that inspired an International Lace Challenge”
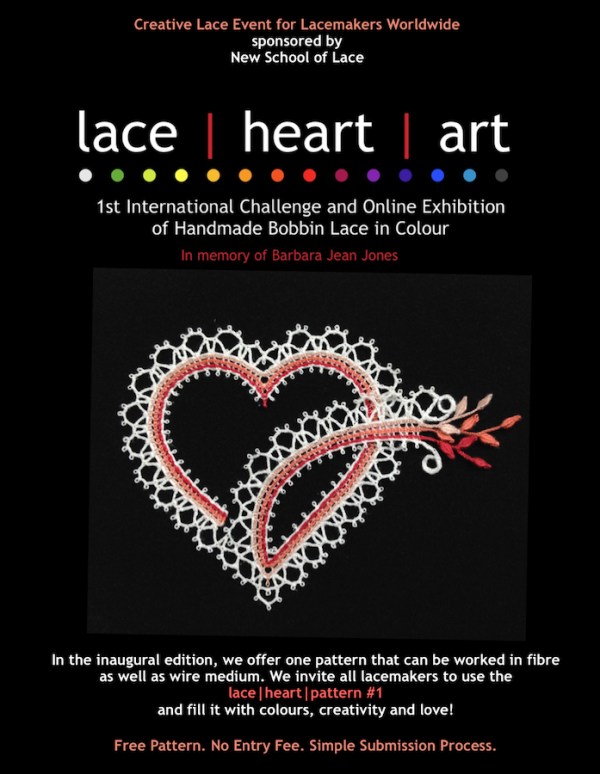
A slide show presentation and talk will focus on place of traditional crafts in today’s society, and their capability to facilitate connecting, sharing and healing in families and communities. Our message, perhaps needed now more than ever, contributes to an important discussion about value of handwork and crafts for overall wellbeing and quality of life.
Saturday, March 24th, time to be confirmed.
Visit FibresWest website for more information.
WIRE LACE PATTERNS & SUPPLIES
New patterns are coming slowly, but surely. Stay tuned!

They will be soon added to my Wire Lace Supplies Etsy shop. To receive a notice about new listings, and occasional sales, subscribe to the Lenka’s Way of Lace News and select Interest: Wire Lace Supplies.
Happy lacemaking,Lenka

- Choose the Newsletter to receive comprehensive information about everything what is going on in Lenka’s Way of Lace Studio
- Choose the New School of Lace for detailed information about workshops and courses in Surrey, BC, Canada, and occasionally elsewhere.
- Choose the Wire Lace Supplies for updates about new patterns and materials, sales and special events.
